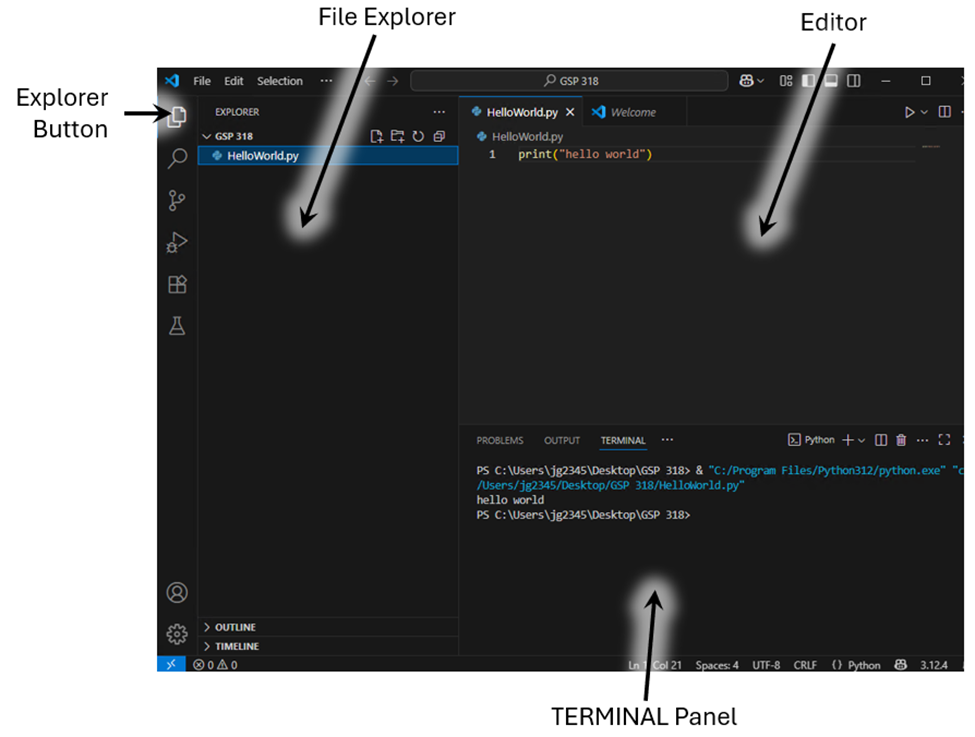
This tutorial will get you started programming in Python really quickly. We'll use the Visual Studio Code (VSC) for an Integrated Development Environment (IDE). This is similar to the Wing IDE that GSP 318 used in the past.
This section shows you how to get started with Python and VSC if you are not using one of the CPH computers that already has them installed.
If you have installed ArcGIS, then you should already have Python installed on your computer. However, this copy only works with ArcGIS so you'll want to install your own copy.
Note: ArcGIS installs a custom version of Python that has some compatibility problems with Python libraries. We'll talk more about this later.
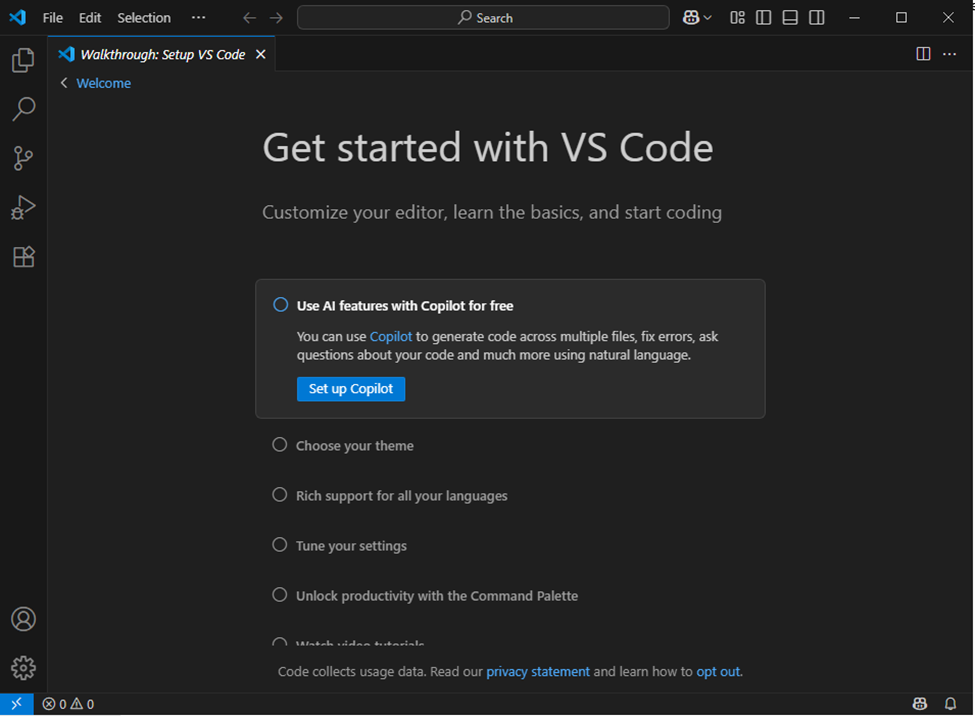
I do recommend clicking on “Choose your theme” and select a theme you like. Remember to get one that is high contrast so you can see everything. Then, you can just close this panel by clicking on the “x” in the right side of the panels tab (it is labeled “walkthrough Setup VS Code”.
There are a lot of features in VSC but we are only going to need a few for this class. One really important one is the debugger.
We'll get started by creating a new file to print out information.
print("Hello World")
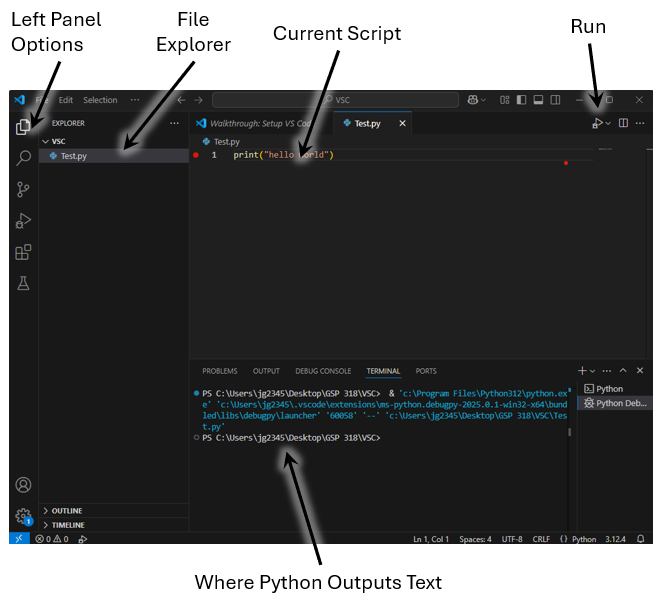
You just used the "print()" function to write out a "string" of text to the Terminal panel. This is a very powerful way to see what your programs are doing and you'll use print() a great deal. For now, you can type anything you want between the quotes inside the parenthesis and see it typed out. Try some of the examples below and then make up at least 5 of your own. Change the text in the print function and press the "run" button and verify that you see your output in the "Terminal" panel.
print("Computers are just machines")
print("I have to make sure each statement is correct")
print("Fortunately, the IDE will help me do this!")
You've now printed out some "strings". Strings are sequences of "characters" which are coming from the keyboard and into the computer as you type them. Strings are used to input text into programs and output text from programs. Python itself is a "text-based" language that the Python interpreter (another program) converts into a language the computer understands (pretty cool eh?). There are a number of other data types and also more complex structures that combine these data types.
Type the following and press run:
print(2+2)
You should see "4" appear in the Debug I/O panel. Python allows us to perform a wide variety of mathematical operators just by typing them. The plus ("+") and minus ("-") symbols are for additional and subtraction. The asterisk ("*") is used for multiplication and the back slash ("/") is used for division. Try the following and then try some of your own:
print(10*13)
print(20/2)
These numbers are all integer values or values that do not have anything after the decimal.
Floating point numbers allow us to have fractional values. Try the following and then try some of your own.
print(2.3+1.2)
print(2.3*2)
print(2.1*3+2-0.2)
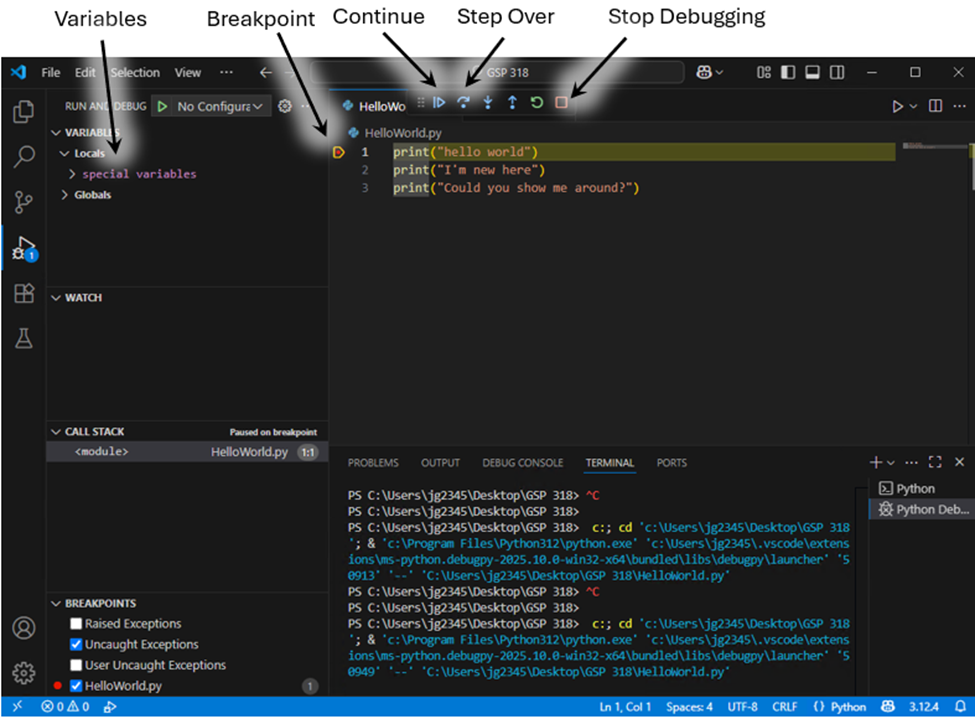
VSC includes a powerful tool to help you debug your programs and it makes a great tool to learn programming.
On the left side of the script panel, you'll see an arrow when you run your program. Click in the arrow and you should see a red dot appear. This is called a "break point" and VSC will stop at this point when we run the debugger.
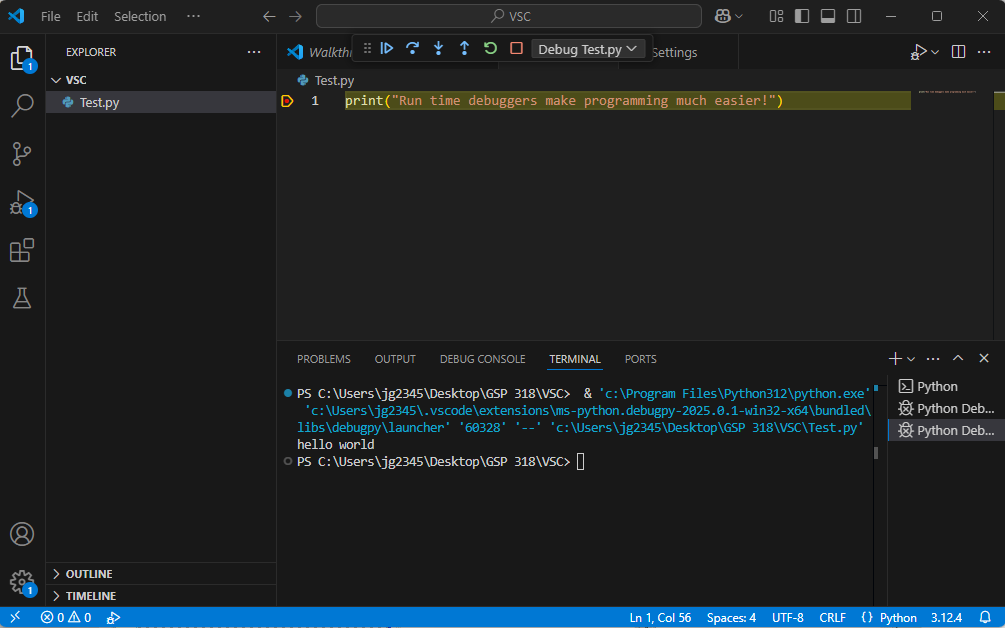
Click on the drop down arrow next to the run (arrow) button and select "Python Debugger: Debug Python File".

You should see something like the following:
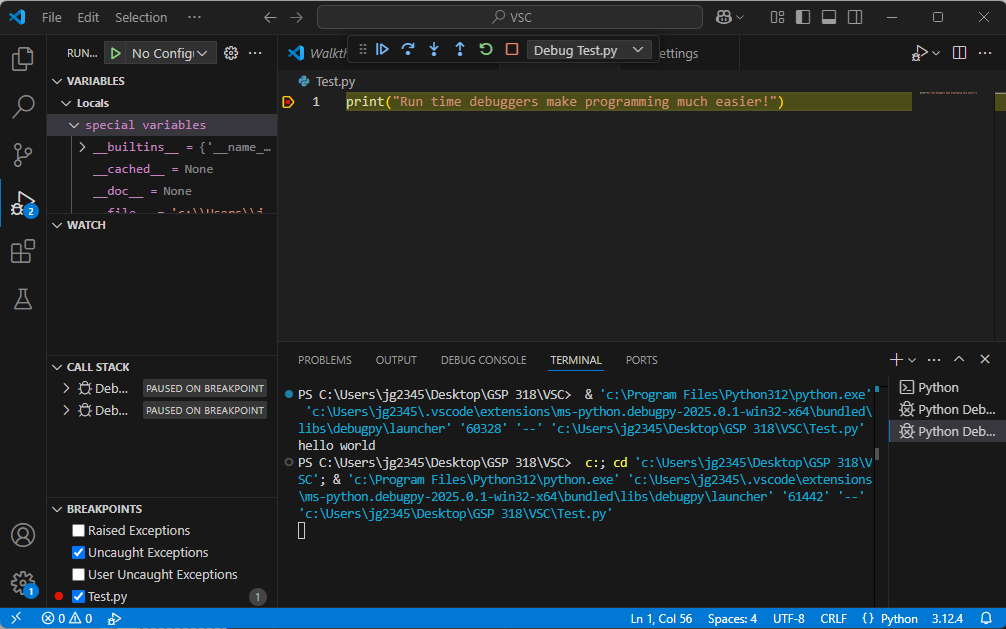
This indicates that the IDE has "stopped execution" at the line where you placed the breakpoint. You now have "variables" appearing on the left panel and the arrow is selected to the left of that. Note that when you want to return to your script, just click on the first icon in the far left panel (looks like two pages). Remove the breakpoint for now and we'll talk more about breakpoints and debugging in the future.
Variables are how we store values within a program. Python is an "untyped" language which means it is very easy to create variables. For example, try:
x=10
print(x)
Now that we can declare variables, we can perform operations on them and then print out the results. Try:
x=10
y=3
z=x*y
print(z)
We'll be using variables in almost all of our scripts so spend some time creating different variables and doing simple arithmetic. The standard symbols work including; +, -, *, /, and ^.

You can use the "Step Over" button to step line by line through your code and watch it create variables and compute values. This is makes it relatively easy to debug your programs.
Important: In just a few more chapters, you'll be writing Python very quickly. However, your programs will then have problems and you'll need to quickly stop, set some breakpoints, and see what is wrong. Without having the ability to set breakpoints and examine variables as they change on each line of code, you can spend days trying to find even simple programming errors.
Write some more lines of code at this point and use breakpoints and the "step-over" button to see how they are created and changed in your programs.
As we mentioned earlier, computers are just machines and if we make a mistake in the syntax of our scripts the IDE will let us know. Type the following into your script and run it:
print("Hi"
In the "Terminal" panel you should see an error. Notice that other than giving the line number where the error occurred, the error messages are not very helpful. This is pretty typical of errors from interpreters in all languages. Add the missing parenthesis to the end of the "print" function and run the program again. The exception should go away but watch for them in the future and fix them before moving on.
Just as important as the scripting we create is the documentation that goes with the scripts. If you don't add documentation you'll quickly find yourself wondering what the scripts do! Imaging what would happen if you didn't comment your code and you don't come back to it for a year or more. You'd probably have to rewrite the script from the start.
Comments allow us to add text into our programs that the Python interpreter will just ignore. Just type a pound sign ("#") and then your comment like the following:
# this is a comment
VSC has some issues that make it different from what has been the standard for Python development environments for over 20 years. This includes:
Typically, when you run a script, the folder that contains the script becomes the current working folder. This means you don't have to specify full file paths if the files you want to access are in the same folder. The code below will change scripts running in VSC to work like the python interpreter when it is run outside VSC (this will become important later).
 # Change the working folder to be the folder with the python  script in it
 import os # import the library with the functions we need
 CurrentFilePath = os.path.abspath(__file__) # Get the full  path to this python script
 CurrentFolder = os.path.dirname(CurrentFilePath) # Get the  path to the folder/directory for the script
 os.chdir(CurrentFolder) # change the current working folder  to the one for this script
Because of the problem above, the VSC Pylance code will indicate that some imports "could not be resolved". This is an error with Pylance and not with your code so typically you can ignore this error.
To disable Pylance (which I recommend):
© Copyright 2018 HSU - All rights reserved.